UIViewでもこっそり Property Wrapperが使えるようになっていました。 (なお、iOS15からです。)
UIViewの表示の更新
今まで、UIViewの見た目を変更するには、View自体を作り直すか、Viewの更新処理を手動でよんだり(setNeedsDisplay)していました。
iOS15から導入された UIViewInvalidating を使えば、値を更新するだけで表示も更新されるようになります。
指定したい変数に下記のように@Invalidatingをつけ、必要なInvalidationTypeを設定するだけなので簡単ですね。
    @Invalidating(wrappedValue: "Hello", .display) var title: String
    @Invalidating(wrappedValue: CGPoint.zero, .display, .layout) var myPosition: CGPoint
上記の場合、titleを更新すると、setNeedsDisplay、myPositionを更新するとsetNeedsDisplay、setNeedsLayoutがよばれます。
実例
簡単なUIViewで見てみましょう。
まずは、今までの方法を使っているUIView。MyOldViewというクラス名にしますね。
class MyOldView: UIView{

    var lineColor: UIColor = UIColor.red

    var titlePosition: CGRect = CGRect(x: 0, y: 0, width: 50, height: 30)
    var title: String = "Hello"
    var labelTitle: UILabel? = nil

    override init(frame: CGRect) {
        super.init(frame: frame)

        let aLabelTitle = UILabel(frame: titlePosition)
        aLabelTitle.text = title
        addSubview(aLabelTitle)
        labelTitle = aLabelTitle
    }

    required init?(coder: NSCoder) {
        fatalError("init(coder:) has not been implemented")
    }

    override func draw(_ rect: CGRect) {
        print("called from setNeedsDisplay")
        super.draw(rect)
        self.layer.borderColor = lineColor.cgColor
        self.layer.borderWidth = 2.0
    }

    override func layoutSubviews() {
        print("called from setNeedsLayout")
        super.layoutSubviews()
        labelTitle?.frame = titlePosition
    }
}
そして、@Invalidatingを導入した UIView。MyNewViewとしましょう。
class MyNewView: UIView {

    @Invalidating(wrappedValue: UIColor.red, .display) var lineColor: UIColor

    @Invalidating(wrappedValue: CGRect(x: 0, y: 0, width: 50, height: 30),
                  .display, .layout) var titlePosition: CGRect

    var title: String = "Hello"
    var labelTitle: UILabel? = nil

    override init(frame: CGRect) {
        super.init(frame: frame)

        let aLabelTitle = UILabel(frame: titlePosition)
        aLabelTitle.text = title
        addSubview(aLabelTitle)
        labelTitle = aLabelTitle
    }

    required init?(coder: NSCoder) {
        fatalError("init(coder:) has not been implemented")
    }

    override func draw(_ rect: CGRect) {
        print("called from setNeedsDisplay")
        super.draw(rect)
        self.layer.borderColor = lineColor.cgColor
        self.layer.borderWidth = 2.0
    }

    override func layoutSubviews() {
        print("called from setNeedsLayout")
        super.layoutSubviews()
        labelTitle?.frame = titlePosition
    }
}
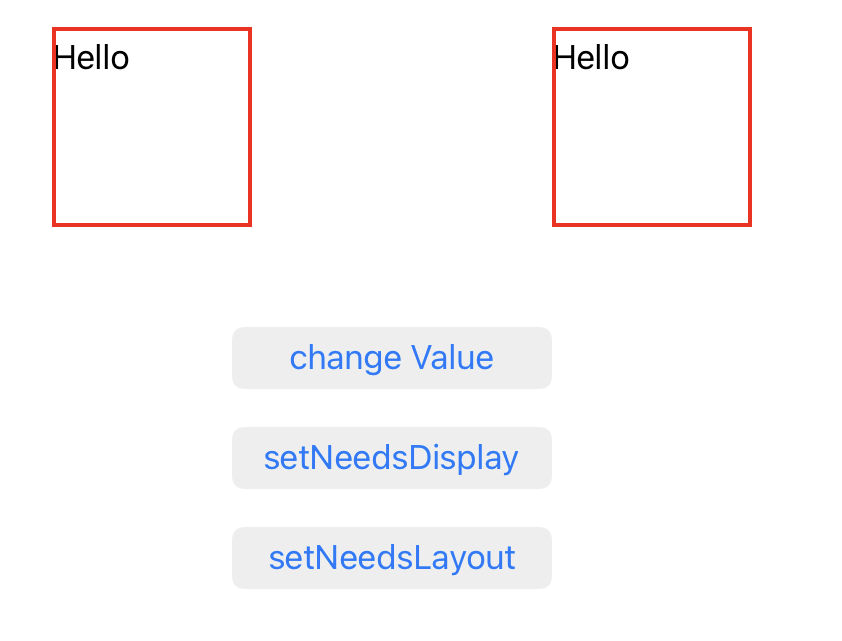
この二つのViewをViewController上に生成してみます。MyNewViewを左に、MyOldViewを右におきます。
class ViewController: UIViewController {

    var oldView: MyOldView? = nil
    var newView: MyNewView? = nil

    override func viewDidLoad() {

        super.viewDidLoad()

        let aNewView = MyNewView(frame: CGRect(x: 50, y: 50, width: 100, height: 100))
        view.addSubview(aNewView)
        newView = aNewView


        let aOldView = MyOldView(frame: CGRect(x: 300, y: 50, width: 100, height: 100))
        view.addSubview(aOldView)
        oldView = aOldView

        // あとボタンなども作っておきます。
    }
}
 |
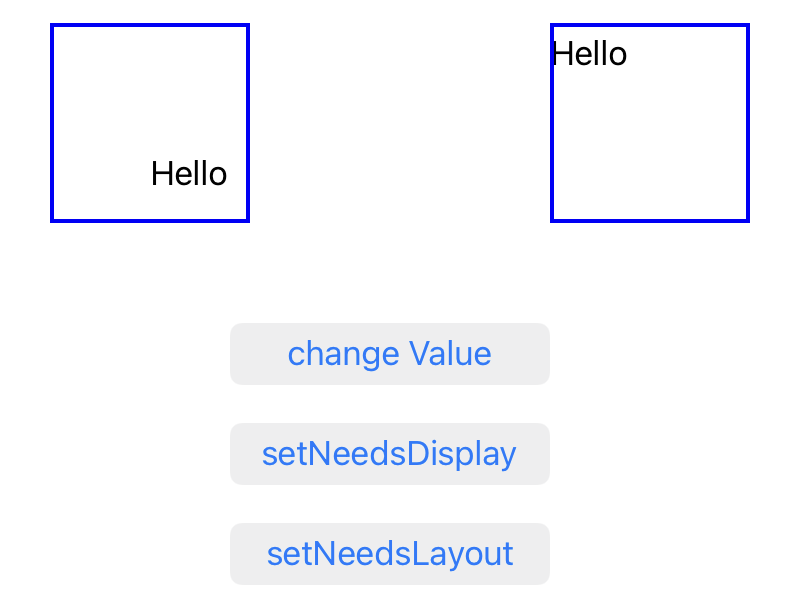
そして、二つのViewのプロパティを変えてみましょう。左のMyNewViewだけ、表示が更新されました。
    @IBAction func changeValue(_ sender: Any) {

        oldView?.lineColor = UIColor.blue
        newView?.lineColor = UIColor.blue

        oldView?.titlePosition = CGRect(x: 50, y: 50, width: 50, height: 50)
        newView?.titlePosition = CGRect(x: 50, y: 50, width: 50, height: 50)
    }
 |
両方のViewに対してsetNeedsDisplayをよんでみましょう。MyOldViewの色も変わりました。
    @IBAction func buttonSetNeedsDisplay(_ sender: Any) {

        oldView?.setNeedsDisplay()
        newView?.setNeedsDisplay()
    }
 |
最後に、両方のViewに対してsetNeedsLayoutをよんでみましょう。MyOldViewのテキストの位置も変わりました。
    @IBAction func buttonSetNeedsLayout(_ sender: Any) {

        oldView?.setNeedsLayout()
        newView?.setNeedsLayout()

    }
 |
MyNewViewは、setNeedsDisplayもsetNeedsLayoutも呼ぶ必要がないことがわかりましたね。
InvalidationType
@Invalidatingで指定している.displayや.layoutはInvalidationTypeです。
.displayを指定すると、setNeedsDisplay、.layoutを指定すると、setNeedsLayoutがよばれます。
    @Invalidating(wrappedValue: "Hello", .display) var title: String
    @Invalidating(wrappedValue: CGPoint.zero, .display, .layout) var myPosition: CGPoint
UIViewで利用できるInvalidationTypeは、.configuration、.constraints、.display、. intrinsicContentSize、.layoutの5個です。
まとめ
ここ2、3年、SwiftUIを主流にしたい意図からだろうと思いますが、UIKitのアップデートはあまり大々的にアナウンスされていませんが、よく見るとこっそり変化していたりします。
この機能も、Combineなどと組み合わせたらかなり便利につかえるのではないでしょうか。
でも、iOS15からしか使えないんだったら、UIKitではなくSwiftUIを使うよなぁ……という気もしますね。