iOS14から使えるようになった、 UIContentConfiguration 、便利ですよね。
CollectionViewCellを作らずにCollectionViewを使えます。
UICollectionViewListCell のdefaultContentConfiguration
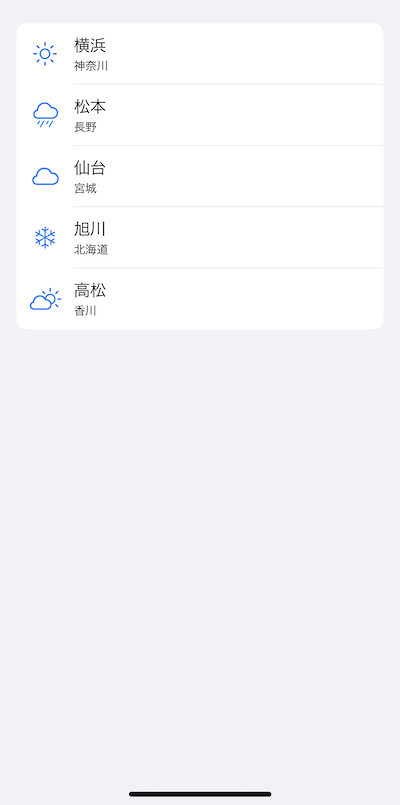
まずは、 UICollectionViewListCell の、 defaultContentConfiguration を使ってみましょう。
cellからdefaultContentConfigurationでConfigurationを取得し、それにStringやImageを渡すだけで要素が表示されます。
    func collectionView(_ collectionView: UICollectionView, cellForItemAt indexPath: IndexPath) -> UICollectionViewCell {

        let cell = collectionView.dequeueReusableCell(withReuseIdentifier: "cell", for: indexPath) as! UICollectionViewListCell

        let info = sampleData[indexPath.row]

        var cellConfiguration = cell.defaultContentConfiguration()
        cellConfiguration.text = info.title
        cellConfiguration.secondaryText = info.subTitle
        cellConfiguration.image = UIImage(systemName: info.iconName)
        cell.contentConfiguration = cellConfiguration

        return cell
    }

コードの全体はこちら。 UICollectionViewListCell defaultContentConfiguration · GitHub
UICellAccessory
UICollectionViewListCellには、アクセサリーをつけることも簡単です。
システムのアクセサリーはcheckmarkやdeleteなどが用意されています。 一度に表示できるシステムアクセサリーは一つです。
        cell.accessories = [.checkmark()]
        cell.accessories = [.disclosureIndicator(displayed: .always, options: .init(isHidden: false, reservedLayoutWidth: nil, tintColor: UIColor.red))]
        cell.accessories = [.delete()]
カスタムアクセサリーも表示することができます。 カスタムアクセサリーは一度に複数表示することができます。 表示位置は、leading/trailing、 編集中だけ表示、常時表示の切り替えもできます。
        let customAccessory1 = UICellAccessory.CustomViewConfiguration(
          customView: UIImageView(image: UIImage(systemName: "bandage")),
          placement: .leading(displayed: .always))
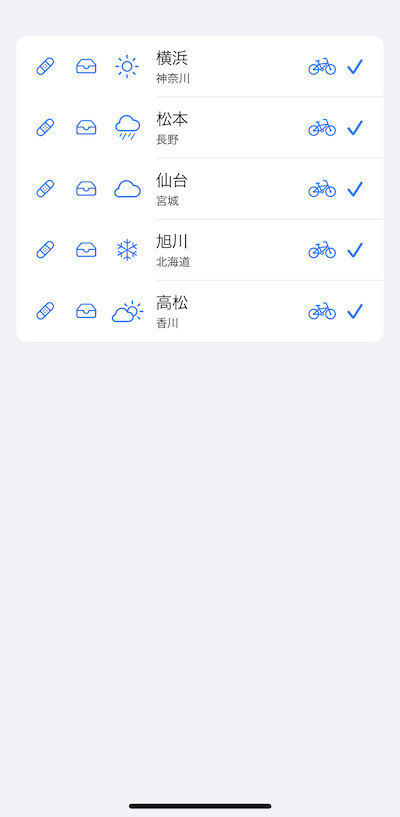
こちらは、3つのカスタムアクセサリーと一つのシステムアクセサリーを表示した例。 バンドエイドマークとトレイマークがleading側につけたアクセサリー、自転車マークがtrailing側につけたアクセサリーです。それにくわえてcheckmarkのシステムアクセサリーをつけています。

全体のコードはこちらです。
updateHandler
iOS15からは、updateHandlerも用意されていて、より柔軟にConfigurationを設定することができます。
        cell.configurationUpdateHandler = { cell, state in
            var content = UIListContentConfiguration.cell().updated(for: state)
            content.text = info.title + "!"
            content.secondaryText = info.subTitle
            content.image = UIImage(systemName: info.iconName)
            if state.isDisabled {
                content.textProperties.color = .systemGray
            }
            cell.contentConfiguration = content
        }
Custom UIContentConfiguration
手軽に使える defaultContentConfiguration ですが、そもそもUICollectionViewListCellでしか使えないんですよね。UICollectionViewCellで同じようなことをしたいな……と思ったら、Custom UIContentConfigurationを作ってみましょう。
ここでは、画像を大きめに表示する LargeImageConfig という UIContentConfiguration と、それが描画するView としてLargeImageContentViewというViewを作っています。
LargeImageConfigには、このConfigurationで保持したいデータを定義します。
struct LargeImageConfig: UIContentConfiguration {

    var mainImage: UIImage? = nil
    var mainTitle: String = ""
    var subTitle: String = ""
    var detail: String = ""

    func makeContentView() -> UIView & UIContentView {
        return LargeImageContentView(configuration:self)
    }
    func updated(for state: UIConfigurationState) -> LargeImageConfig {
        return self
    }

}
LargeImageContentViewは、表示するView部分。 UILabelやUIImageViewなどを置いてみます。
class LargeImageContentView : UIView, UIContentView {

    private var mainImageView: UIImageView = UIImageView(frame: CGRect.zero)
    private var mainTitle: UILabel = UILabel()
    private var subTitle: UILabel = UILabel()
    private var detail: UILabel = UILabel()

    var configuration: UIContentConfiguration{
        didSet{
            updateConfig()
        }
    }

    init(configuration: UIContentConfiguration) {
        self.configuration = configuration
        super.init(frame:.zero)

        addSubview(mainImageView)
        mainImageView.frame = CGRect(x: 220, y: 0, width: 80, height: 80)
        mainImageView.layer.borderColor = UIColor.lightGray.cgColor
        mainImageView.layer.borderWidth = 1.0
        mainImageView.layer.cornerRadius = 5.0
        mainImageView.contentMode = .scaleAspectFit

        mainTitle.frame = CGRect(x: 0, y: 0, width: 300, height: 40)
        mainTitle.font = UIFont.boldSystemFont(ofSize: 30)
        addSubview(mainTitle)

        subTitle.frame = CGRect(x: 0, y: 40, width: 300, height: 20)
        subTitle.font = UIFont.systemFont(ofSize: 15)
        addSubview(subTitle)

        detail.frame = CGRect(x: 50, y: 60, width: 250, height: 80)
        detail.font = UIFont.systemFont(ofSize: 10)
        detail.numberOfLines = 0
        addSubview(detail)

        updateConfig()

    }

    required init?(coder: NSCoder) {
        fatalError("init(coder:) has not been implemented")
    }

    func updateConfig(){

        if let conf = configuration as? LargeImageConfig {
            mainImageView.image = conf.mainImage
            mainTitle.text = conf.mainTitle
            subTitle.text = conf.subTitle
            detail.text = conf.detail

        }
    }

}
表示するとこうなります。

全体のコードはこちらです。 Custom UIContentConfiguration · GitHub
TVMediaItemContentConfiguration
iOSのUICollectionViewCellには画像付きのconfigurationには画像付きのものはありませんが、tvos の UICollectionViewCellには、TVMediaItemContentConfiguration.wideCell などの、画像つきのセルを表示できるconfigurationがデフォルトで用意されています。
tvosでは、画面に表示する要素が限定的なため、このようなConfigurationが用意されていますが、iOSでは画面の表示要素がアプリによって大きく異なるため、システムに画像つきConfigurationが用意されることはなさそうです。
まとめ
UIContentConfigurationを使うとUICollectionViewCellを独自に用意しなくてもUICollectionViewが使えます。 ContentViewやConfigurationを作る必要があるので、手間としてはそれほど変わらないと思う方もいるかもしれませんが、ContentViewやConfigurationは、Modelから独立したレイアウト要素として分離して定義できるので、全体の設計がかなりすっきりしてくると思います。
なお、CollectionViewには、ここであげたUIContentConfiguration以外にも便利な機能が増えています。まだキャッチアップできていない感じなら、こちらのビデオをみるとよいでしょう。 CollectionViewの今までの歴史から始めて、ざっと新しい機能について説明してくれます。 詳しいことはこっちのビデオをみるといいよ!というリンクで他の動画に誘導してくれるので、概要を理解することができます。 Advances in UICollectionView - WWDC20 - Videos - Apple Developer
UIContentConfigurationが含まれた詳細なサンプルコードはこちら。 Implementing Modern Collection Views https://developer.apple.com/documentation/uikit/views_and_controls/collection_views/implementing_modern_collection_views